Exclusive PepperHarrow Celosia Seeds
Celosia has become one of the most beloved annuals on our farm. With their unique blooms, long vase life, and stunning dried flower presence, these varieties bring vibrant color, texture, and personality as they grow in the garden and also bring a unique touch to bouquets. Whether you’re designing wedding florals or filling a cutting garden, our celosia selections offer something special for every style.
📅 Seeds go live in our online shop on January 17th at noon Central!
Pink Lemonade
This is a wonderful mix of dark pinky-peachy blooms that also sometimes throw a mauve to true pink bloom. They’re a treat!
Pink Lemonade is a favorite addition for growers and florists alike. Its dark pink/peachy blended with warmer tones creates a lively, summery look in gardens and arrangements. Their feathery plumes catch the light perfectly, making it unique. They’re excellent for fresh bouquets and drying for later use
Chester Copperpot
The very first celosia we created, originally crafted from our Peaches mix. This beloved variety has remained our #1 best seller season after season.
Our Chester Copperpot Mix has quickly become a standout. Developed over six growing seasons, this Celosia argentea blend features stunning tones of coppery orange, soft gold, muted orange, and deep magenta red, reminiscent of autumn’s warm glow. Its softer, earthy palette makes it perfect for fall bouquets and more rustic arrangements.
Starlight
This is the best celosia to use for wedding and event work. We love a good plumed (argentea) celosia. This one fits the bill for the perfect shape and excellent, workable color.
For something a little more ethereal, Starlight Plumed Mix is a magical choice. These Celosia argentea plumes have a silvery-blush to peachy shade, making them especially lovely in wedding designs, elegant bouquets, or anywhere you want a touch of soft shimmer. They’re also excellent for drying and retaining their gentle hue long after the season ends.
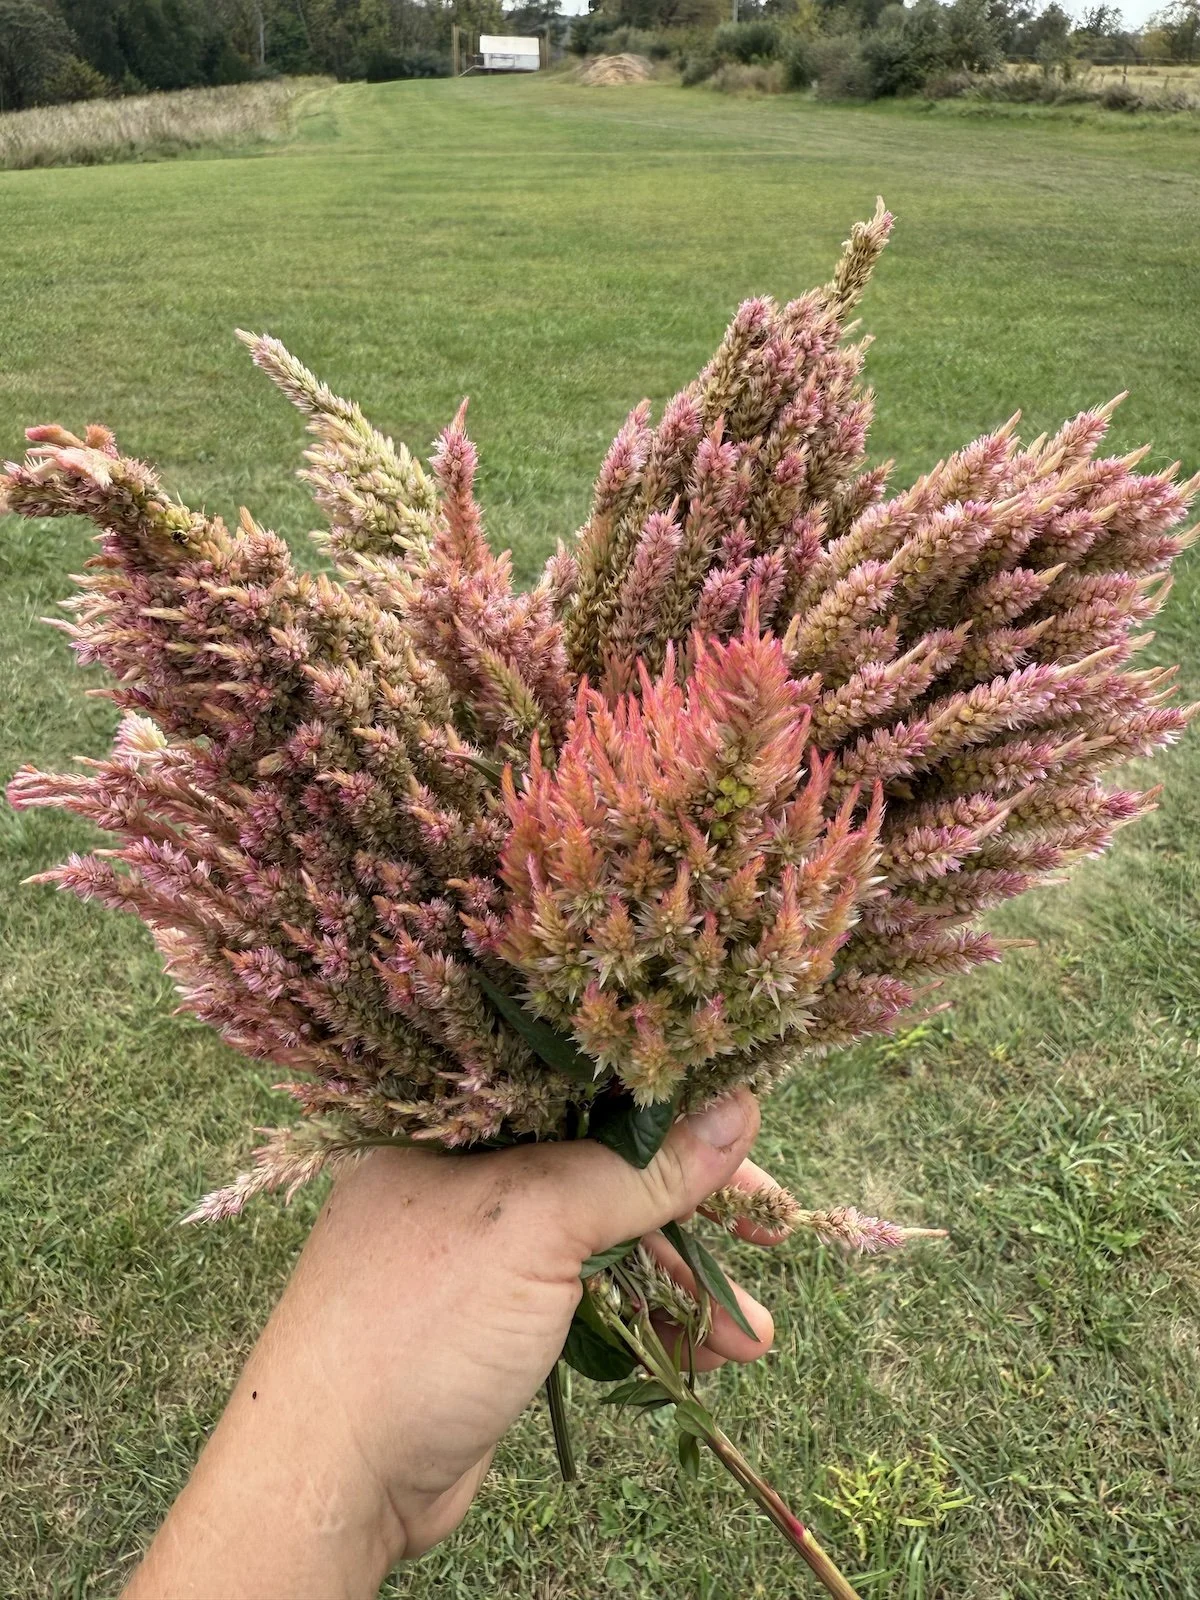
Rainbow Sherbet
Our customers also really love this funky beauty. You’ll occasionally find a stem that’s both hot pink AND peach-the coolest! There are only a few of this beauty available this year, as we are working to replenish our offering.
If you love color that pops, Rainbow Sherbet Mix delivers crowd-pleasing blooms in hot pinks and orangey peach tones with lush, full plumes. These Celosia cristata plants not only brighten garden beds but also make incredible cut flowers and dry beautifully for everlasting arrangements.

Peaches
This lovely orangey-peach crested mix of celosia is pretty hard to find. Each bloom is perfect, especially for late summer into fall bouquets. They’re a personal favorite for us!
Peaches celosia is our personal favorite for good reason. This Celosia cristata variety produces beautiful, richly hued blossoms in soft peach-toned shades that seem to glow in the summer sun. The classic combed form makes it a standout in both bouquets and autumn displays, and we’ve heard from growers that once you plant it, you’ll be hooked year after year.
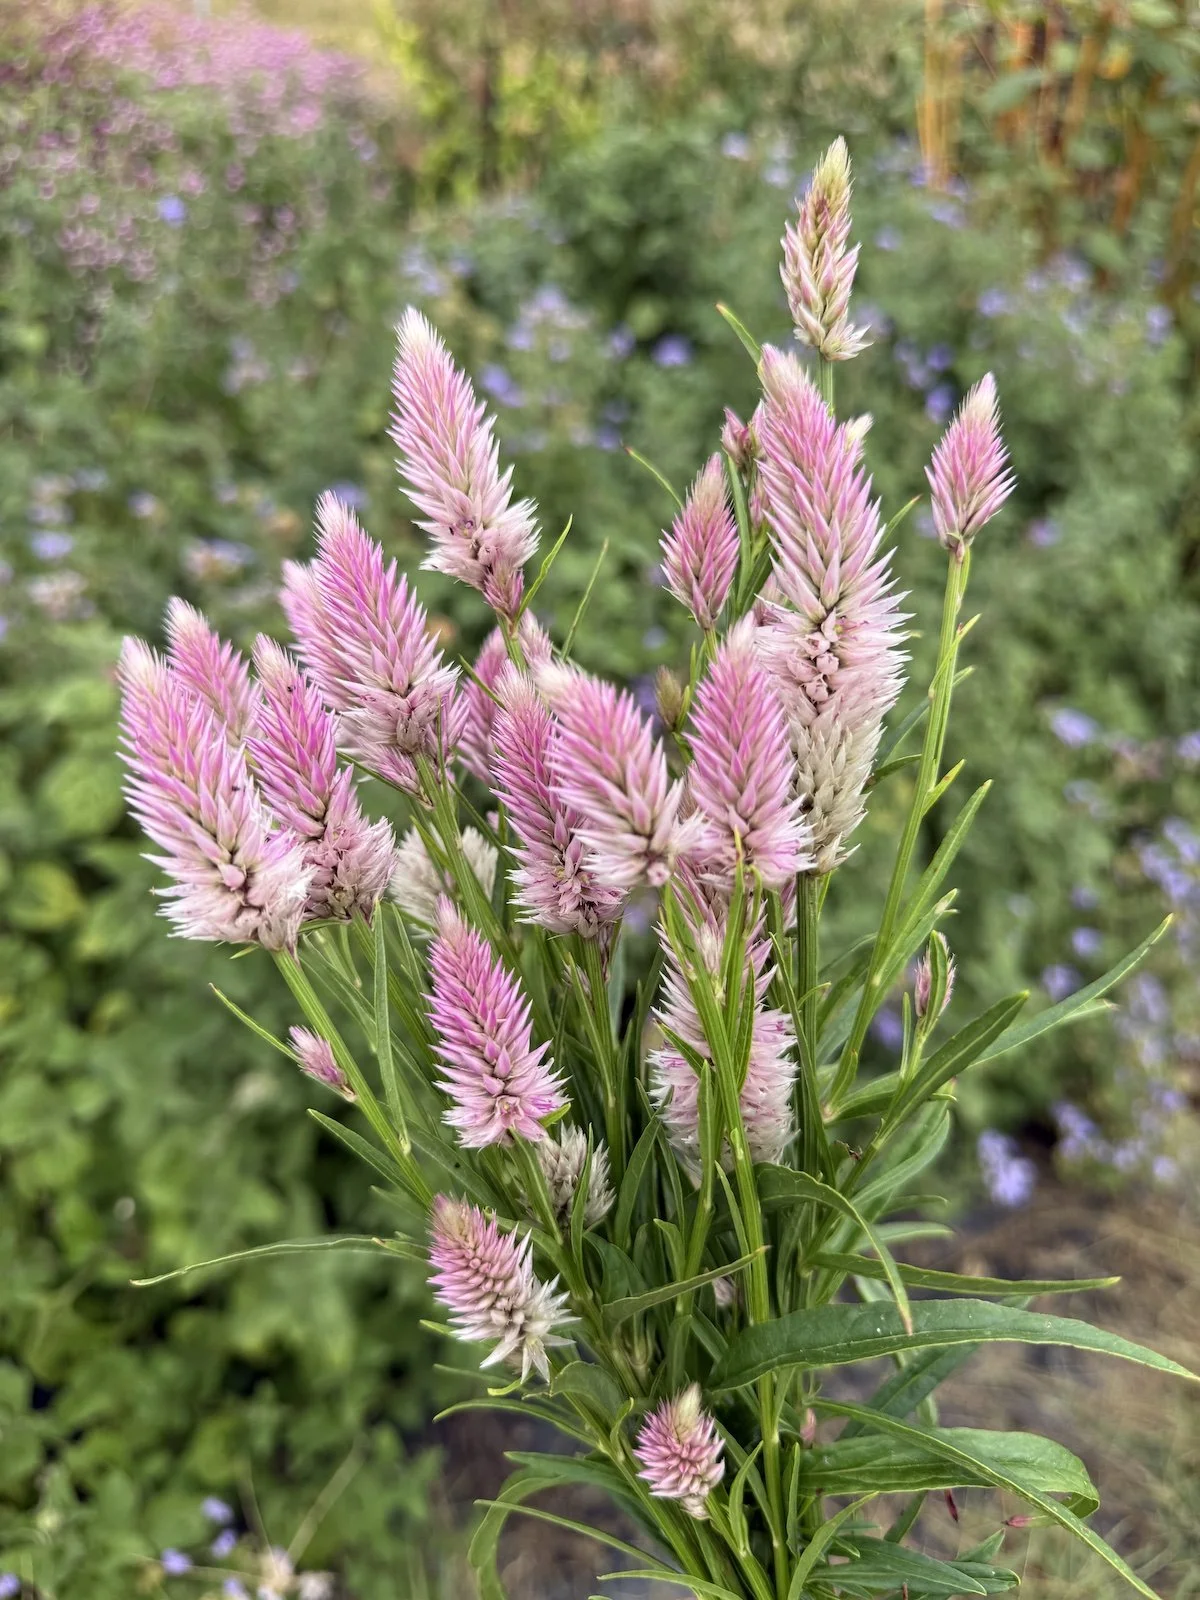
Pink Skies
A blush beauty derived from a cultivar of spiked celosia we started growing a few year’s ago, Flamingo Feather. This beauty has morphed into a softer pink shade that’s fun to work with.
Our Pink Skies Celosia (Celosia argentea spicata) brings a gentle, romantic color to the lineup. Think delicate rose tones that drift across a summer garden like, well, pink skies at dusk. This variety is a lovely complement to deeper tones or stands beautifully on its own in soft, pastel-inspired designs.
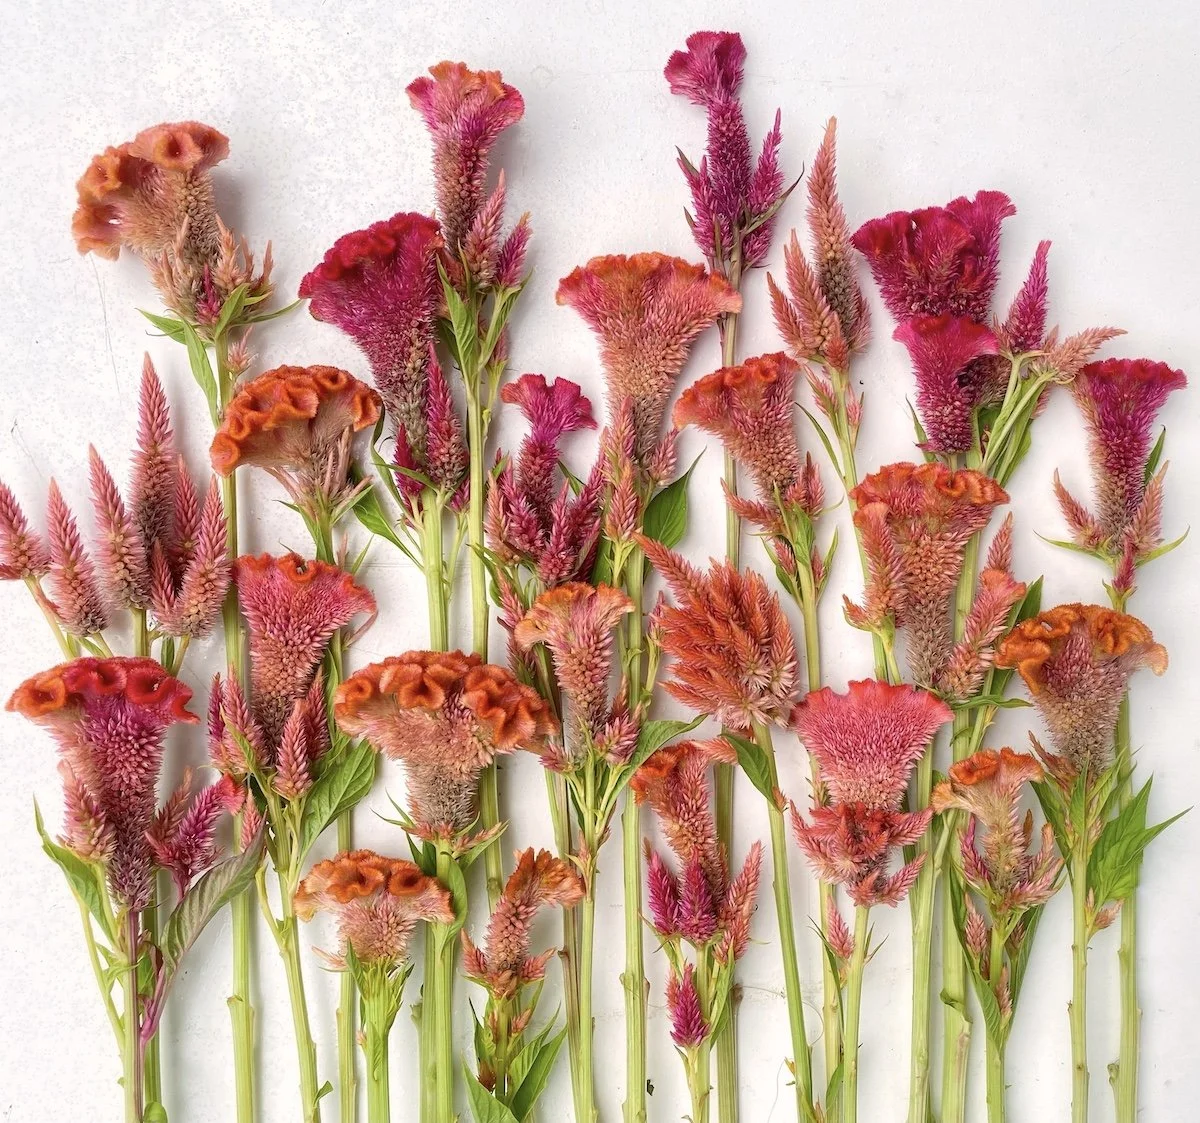
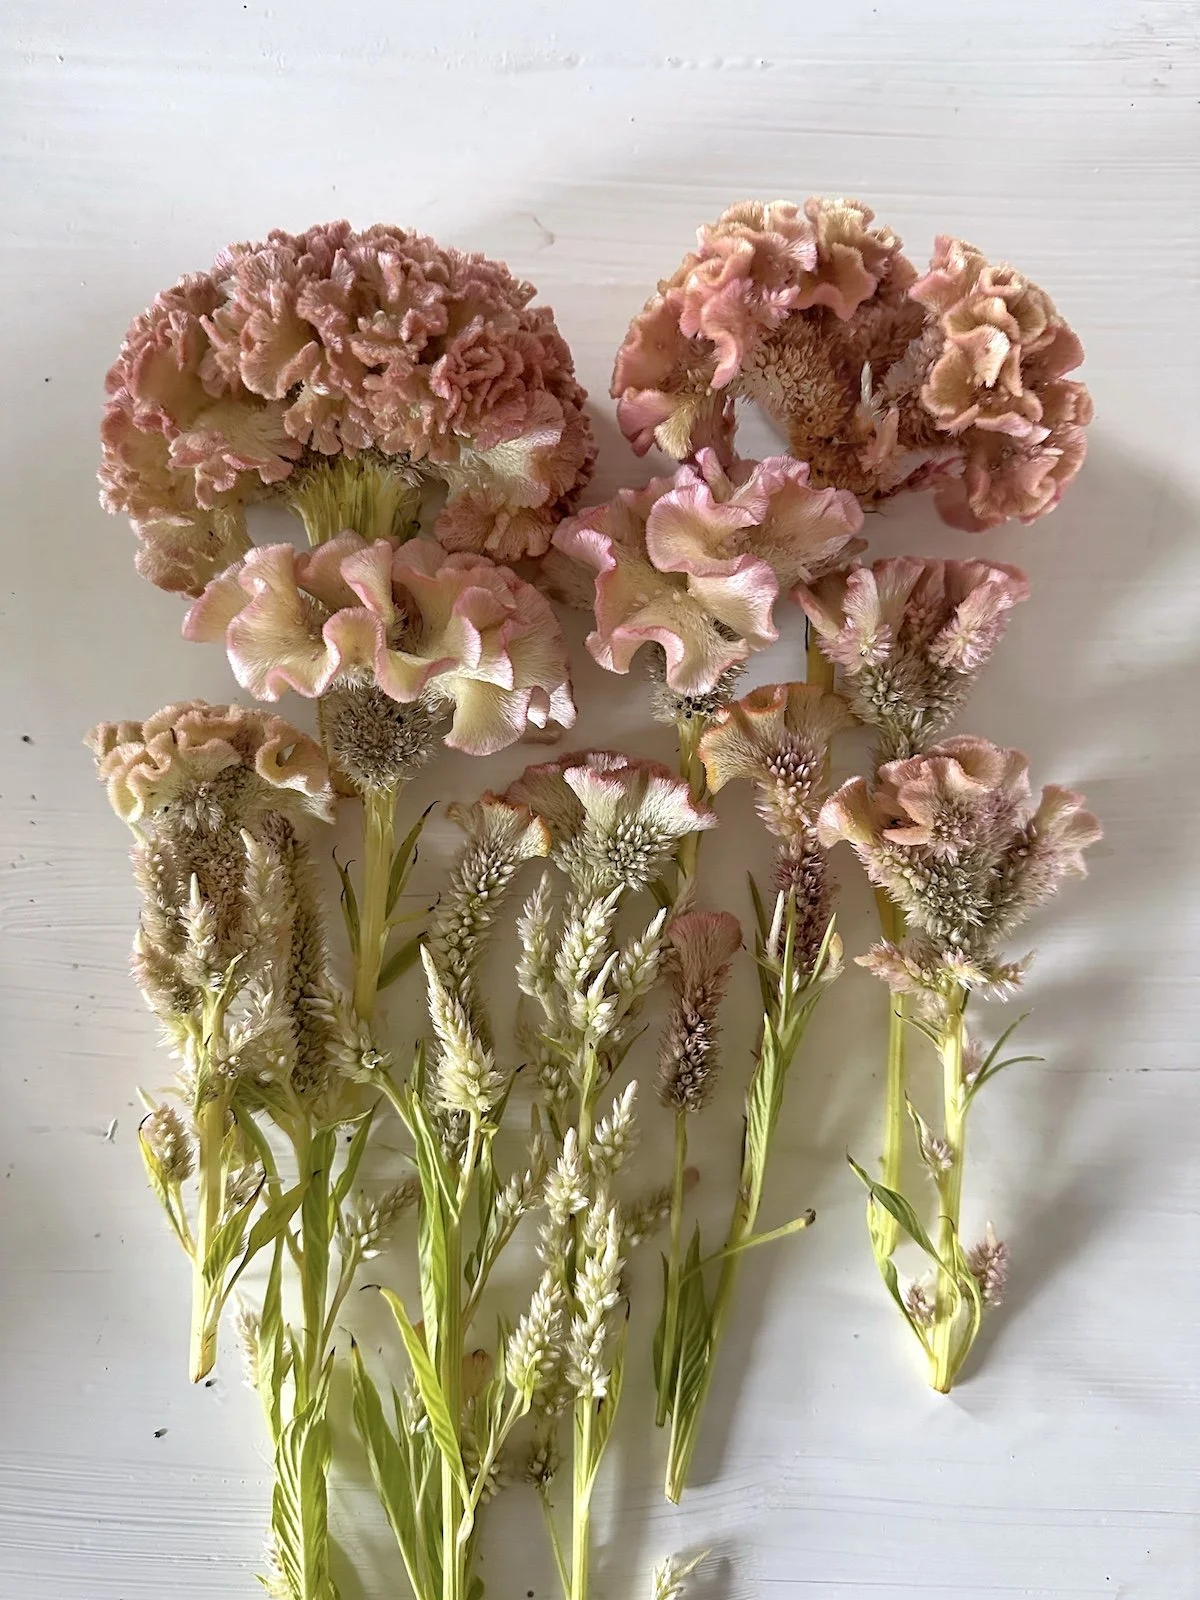
Garden Lovers Mix
Looking to explore different colors and shapes of celosia to find your favorite? Try this beautiful mix! Colors can vary dramatically in each blend. You’ll get anything from peach, orange, hot pink, to golden yellow, hot pink, or burgundy.
The Garden Lovers Mix is a beautiful mix of varied shapes and vibrant colors of celosia from our farm, each bloom showcasing its own unique texture and flame-like form. There’s a wide selection of different varieties to explore, so you can discover which colors and shapes you love most and how they brighten your arrangements.
2026 Intro Moonbeam Ice Cream
NEW for 2026! This is a fun mix of celosia seeds that are unusual with their color, shape and size. These unique beauties were best sellers in straight bunched bouquets for farmer’s market all season long. They’re so cool!
We’re thrilled to introduce Moonbeam Ice Cream, a brand-new celosia variety debuting with this year’s seed launch! While we’re keeping the full reveal under wraps until the shop opens, imagine a dreamy blend of orange dream sickle with a touch of moonlit glow, perfect for gardens that glow long into the evening and bouquets with a whimsical twist.
Garden Lover’s Mix Celosia
Need a Few Easy Growing Tips?
Most of our celosia varieties thrive when started indoors 6–8 weeks before your last frost and transplanted outdoors once danger of frost has passed. They enjoy full sun, well-drained soil, and reward you with vigorous growth and abundant blooms throughout the season. Detailed seed starting instructions will be included with every packet, but you can also catch our YouTube video on seed starting celosia here.
Remember to Save the Date!
Our celosia seeds, including all of the above varieties, drop on our online seed shop on January 17th at noon Central. Plan your wishlist, mark your calendars, and get ready to grow some seriously gorgeous colors of celosia in 2026!
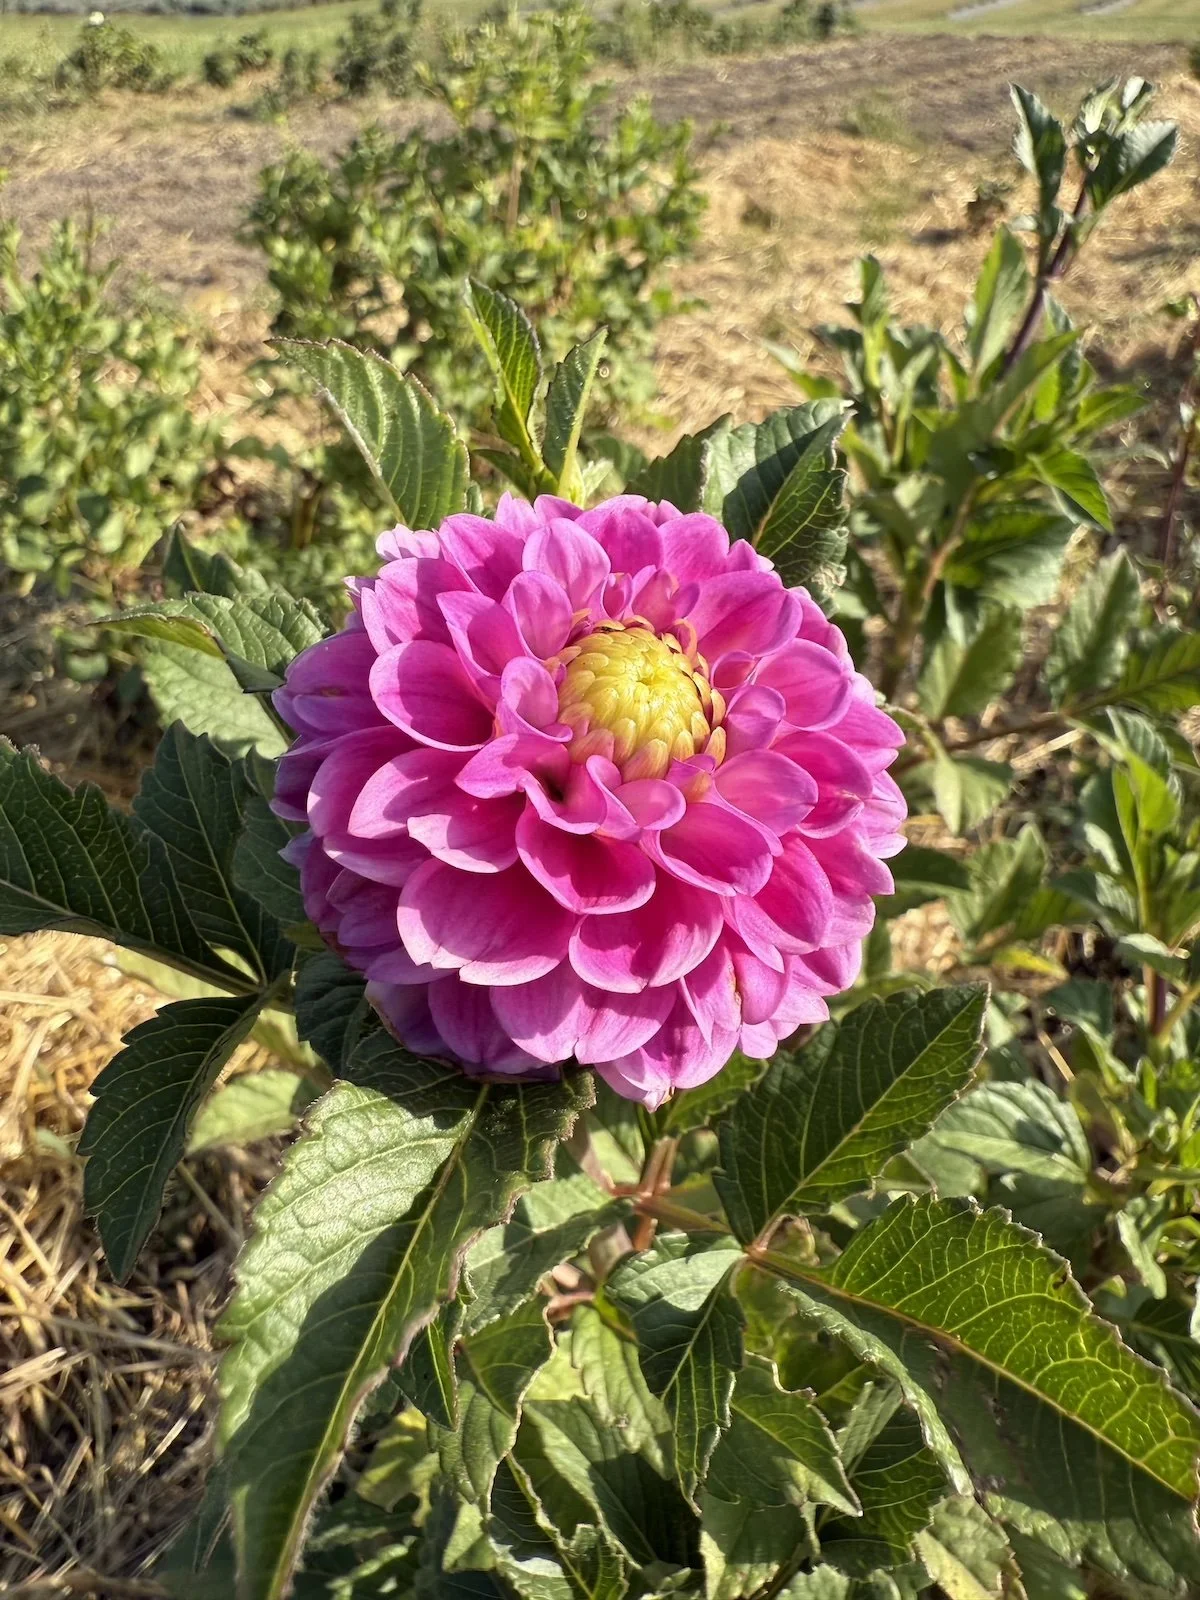
New PepperHarrow ‘Atlas’ Dahlia Introductions
Introducing the Atlas Collection
Bred and grown here at PepperHarrow Flower Farm, our Atlas dahlias represent years of observation, selection, patience, and a little luck from mother nature. These are varieties that proved themselves not just once, but season after season, through heat, wind, cutting buckets, and long summer days in the field. They are strong growers, beautiful performers, and deeply expressive in color and form.
After everything we’ve walked through as a farm, the rebuilding after the 2022 tornado, the long seasons of hardwork, dedication, and the moments that almost broke us, but asked us to keep going, Atlas felt like the right name to carry these specialty dahlias forward. It honors strength without hardness, perseverance without sacrificing beauty.
This year, we’re honored to introduce four new Atlas dahlias to our collection!

This dahlia glows with warmth! Broad, gently pointed petals open in layered shades of coral, soft melon, and sun-washed pink, creating a bloom that feels luminous rather than loud. Toward the center, tighter inner petals add texture and depth, giving the flower a full, generous presence without feeling heavy. The color shifts subtly with light and temperature, making each bloom feel alive and slightly different from the last. Held on strong stems, this variety is well suited for cutting gardens and floral work where warmth, movement, and seasonal color are essential.

It is so fun to share Atlas Fawkes with you! If you love unique, bright, happy colors, this is the dahlia for your garden. It looks just like a glowing summer sunset, with petals that are a mix of deep orange and pretty coral pink.
What makes Atlas Fawkes really special is how perfect it looks. Each petal is tucked into a neat little circle, with a unique gold tip on each petal, making the whole flower look like a soft, round ball. It’s almost like nature used a ruler to make sure every single part is in the right place!
These flowers grow on tall, strong stems that don’t floppy over, which makes them the best choice for picking and putting in a vase on your kitchen table. Note-there is a slight color change in this bloom seasonally and also as the bloom ages.
We've been excited about this beauty for awhile and are jazzed to get to share her with the world. This dahlia feels cheerful and expressive, opening in layers of saturated purple petals that frame a pretty chartreuse center. The contrast between the velvety purple outer petals and the fresh green center gives this variety a unique look. Held on sturdy stems, it performs well as a cut flower and adds an unexpected pop of color and personality to bouquets, borders, and mixed plantings.
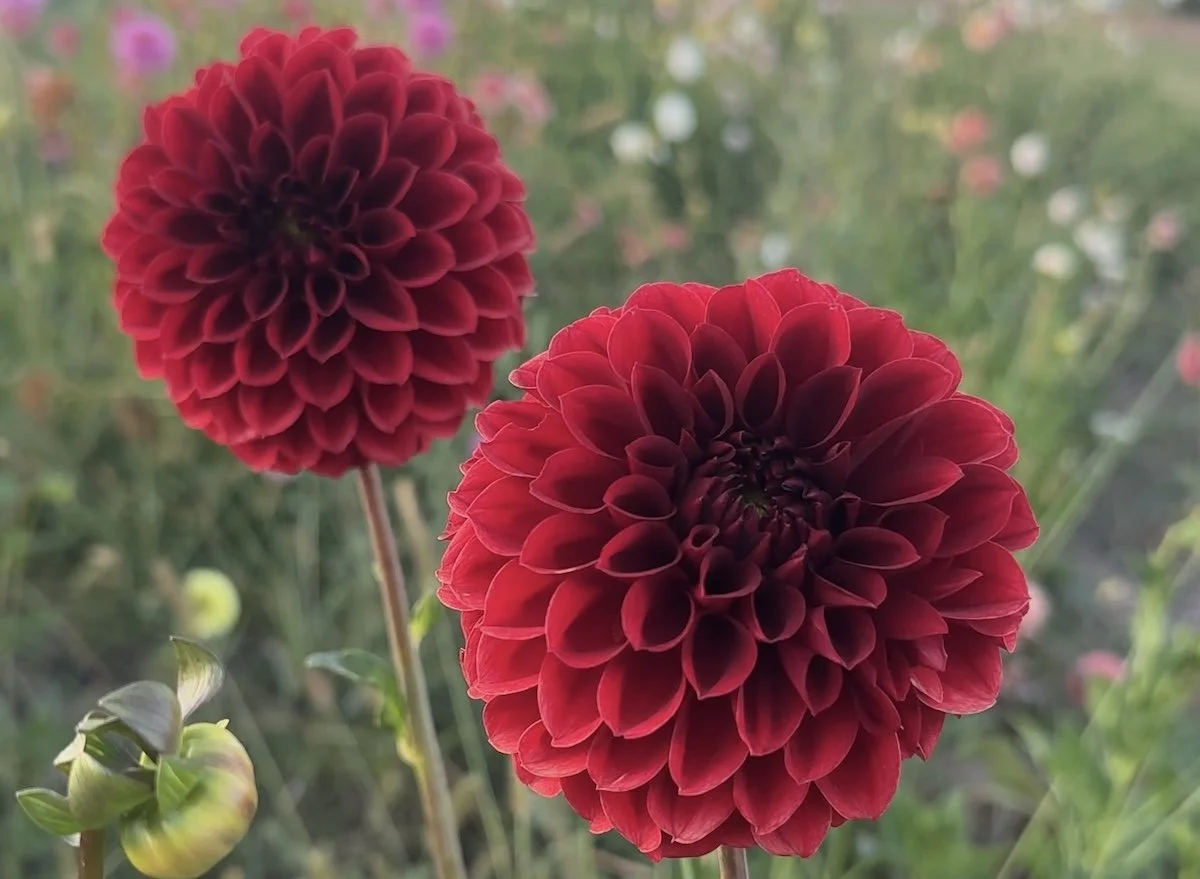
This dahlia commands attention in the field, the vase and it’s Adam’s favorite new introduction. Perfectly rounded blooms form dense layers of velvety petals in a rich, wine-red crimson that reads almost black in low light and glows jewel-toned in the sun. The symmetry is striking but not stiff, with each flower feeling sculptural, substantial, and deeply saturated with color. Strong, upright stems hold the blooms high, making this variety especially valuable for cutting, event work, and bold late-summer arrangements.
The Atlas Collection reflects what matters most to us as growers, beauty that holds up, plants that earn their place in the field, and flowers that feel as good to grow as they do to cut. These dahlias were chosen not just for how they look, but for how they show up, season after season.
We’re honored to send them out into the world and to watch them take on new life in your gardens, studios, and fields. Each tuber carries a bit of PepperHarrow with it, grown slowly, thoughtfully, and with a deep respect for the work and wonder of flowers.
XX Jenn and Adam
Extra Perks Coming this Year for Farm Memberships at PepperHarrow
Life rarely pauses on its own. Days fill quickly, the busyness is constant, and true relaxation often feels just out of reach. People need places that invite them to slow down, places that offer beauty, calm, a sense of belonging and connection.
Over the years, many of you have known PepperHarrow through our traditional Community Supported Agriculture (CSA) programs, such as our Monthly Bouquet Subscription. As the farm has grown, so has our vision for how we share it. We’ve evolved those offerings into a farm membership model, one that goes beyond bouquets alone and invites deeper connection to our flower farm, the seasons, and the experiences that happen here.
This year, we’re also introducing a more elevated option, the Bloom Membership, designed for those who want to stay closely connected to the farm’s beauty, rhythm, and restorative spirit. It’s not about buying more or doing more. It’s about being a key part of our flower farm, escaping to the countryside to enjoy flowers, appreciate the seasons and for taking time to enjoy peace and quiet.
A Slower Rhythm + Beauty That Supports Well-Being
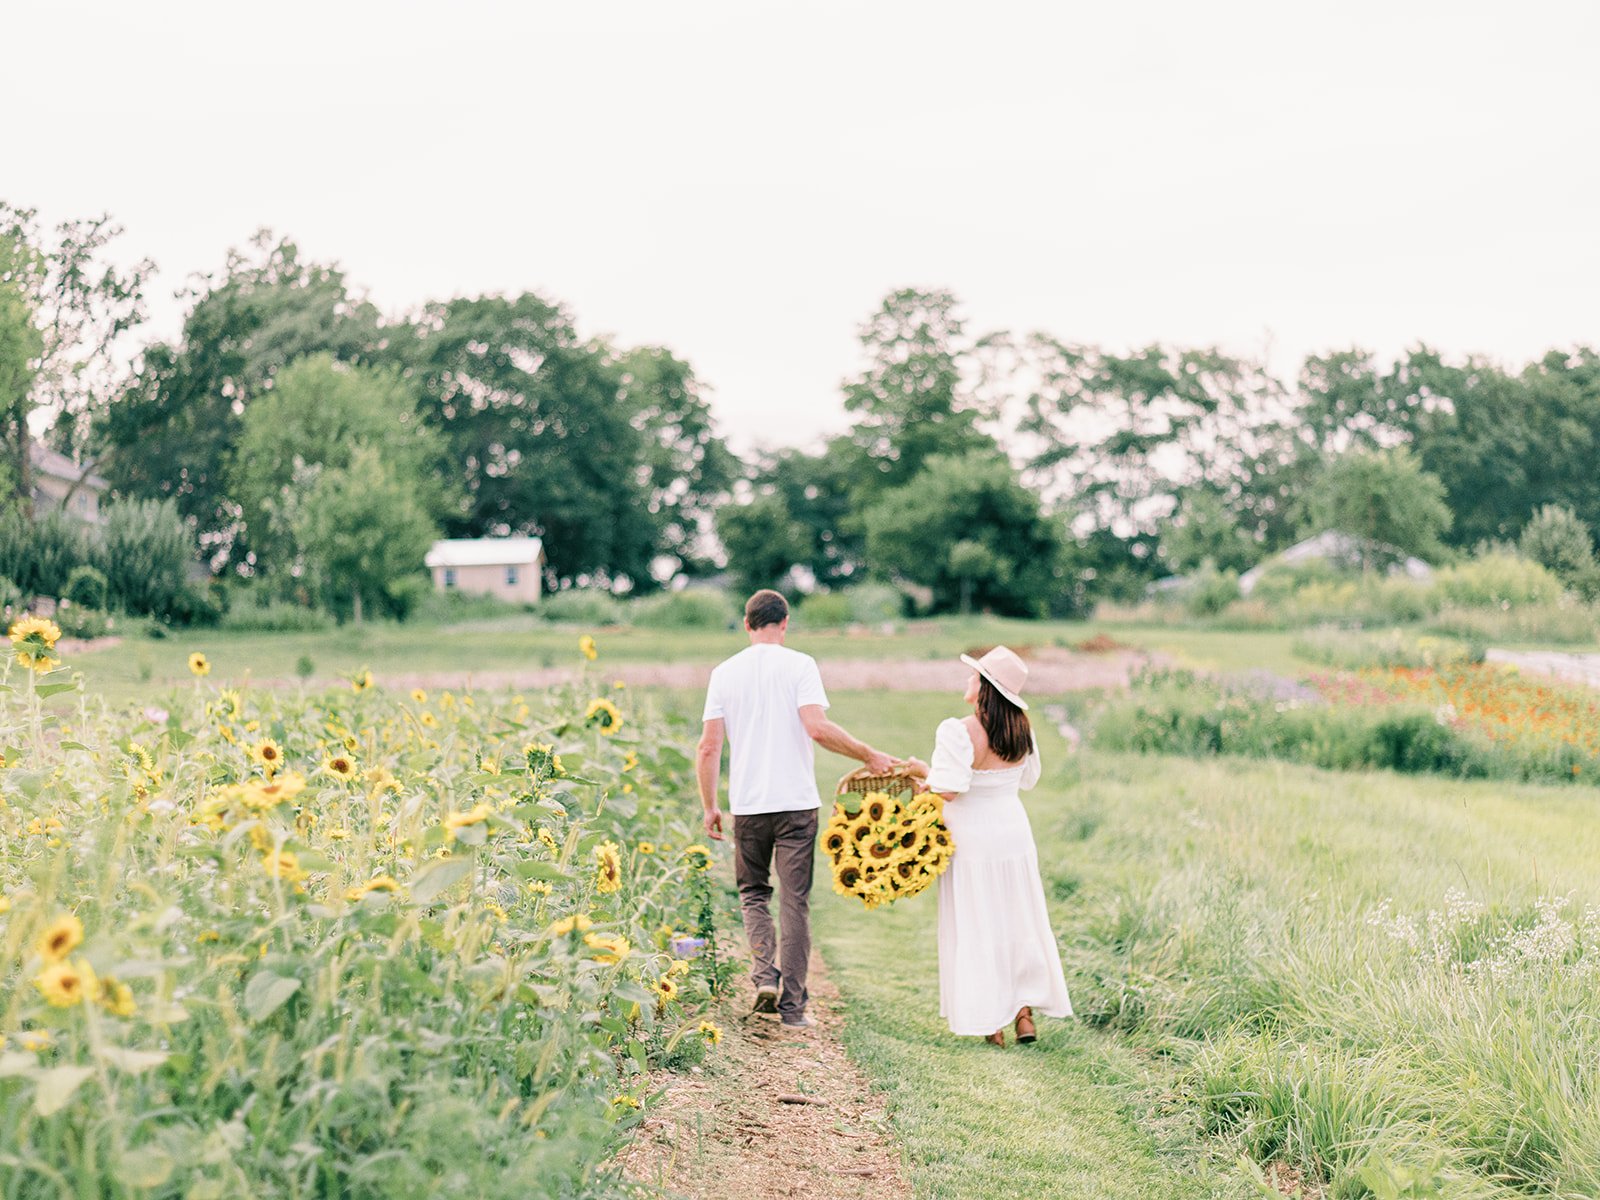
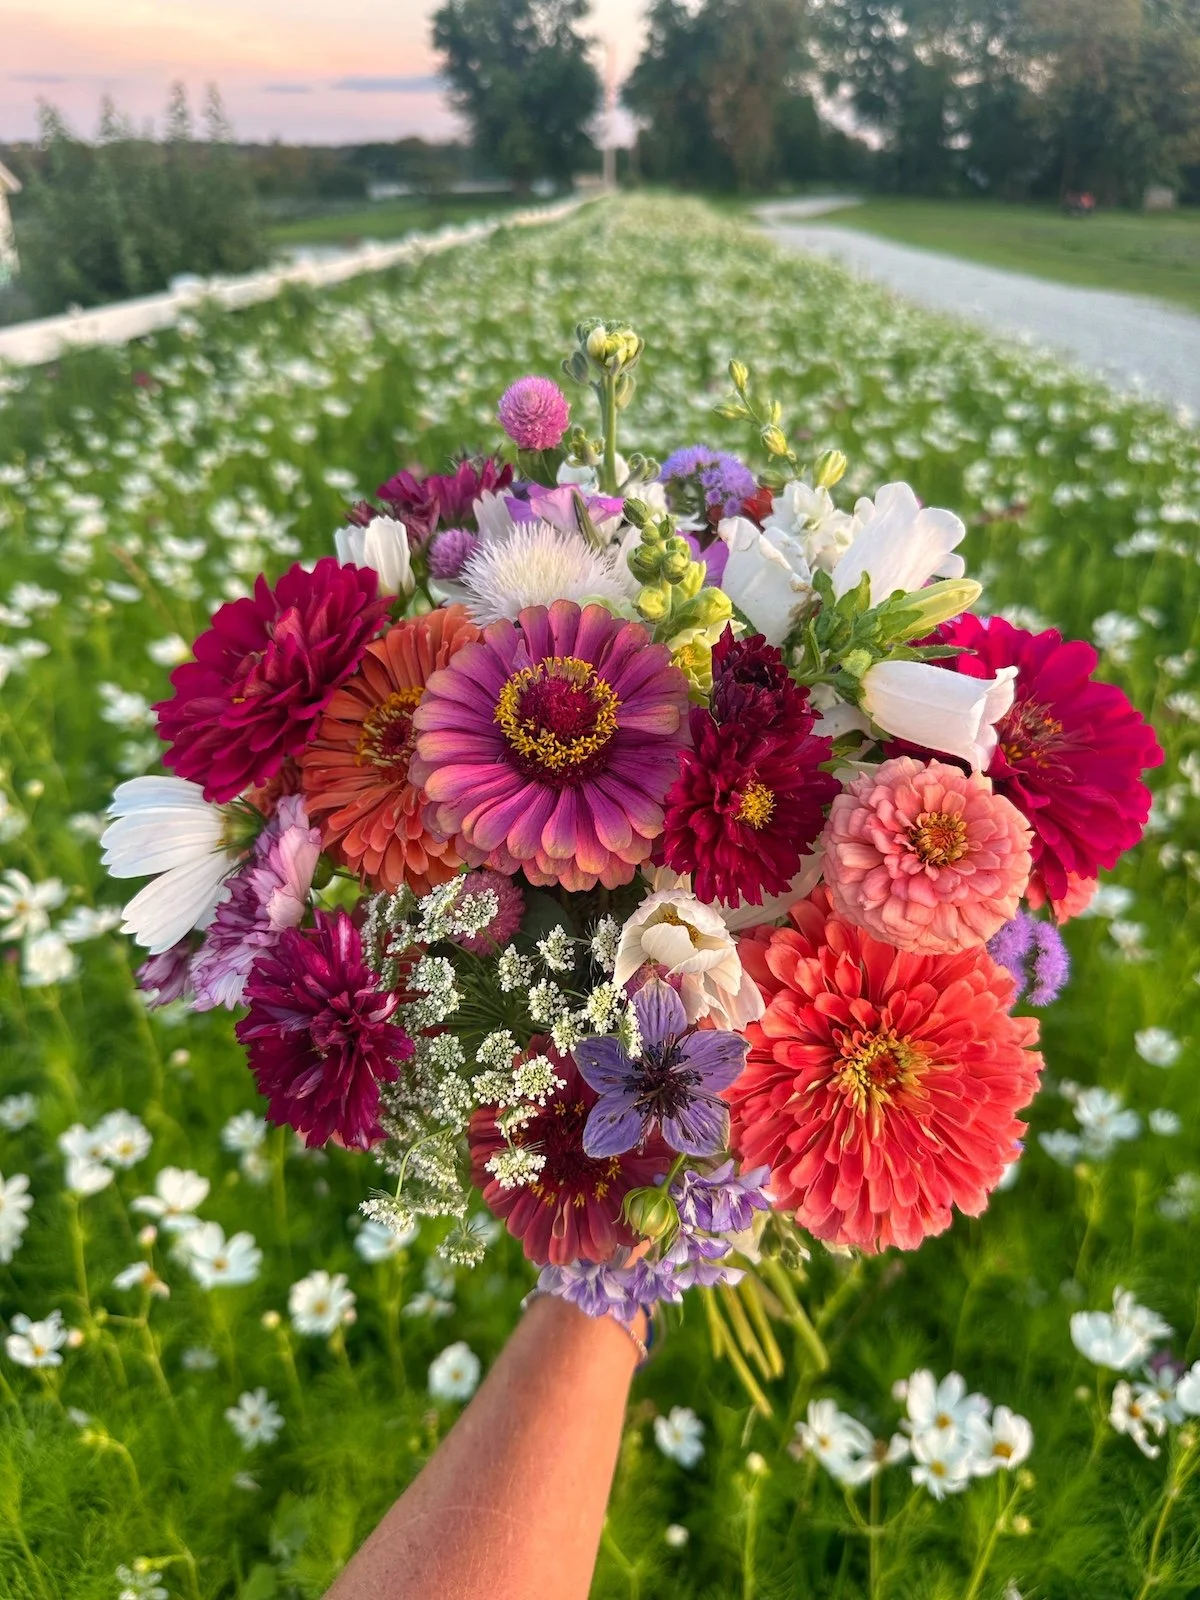
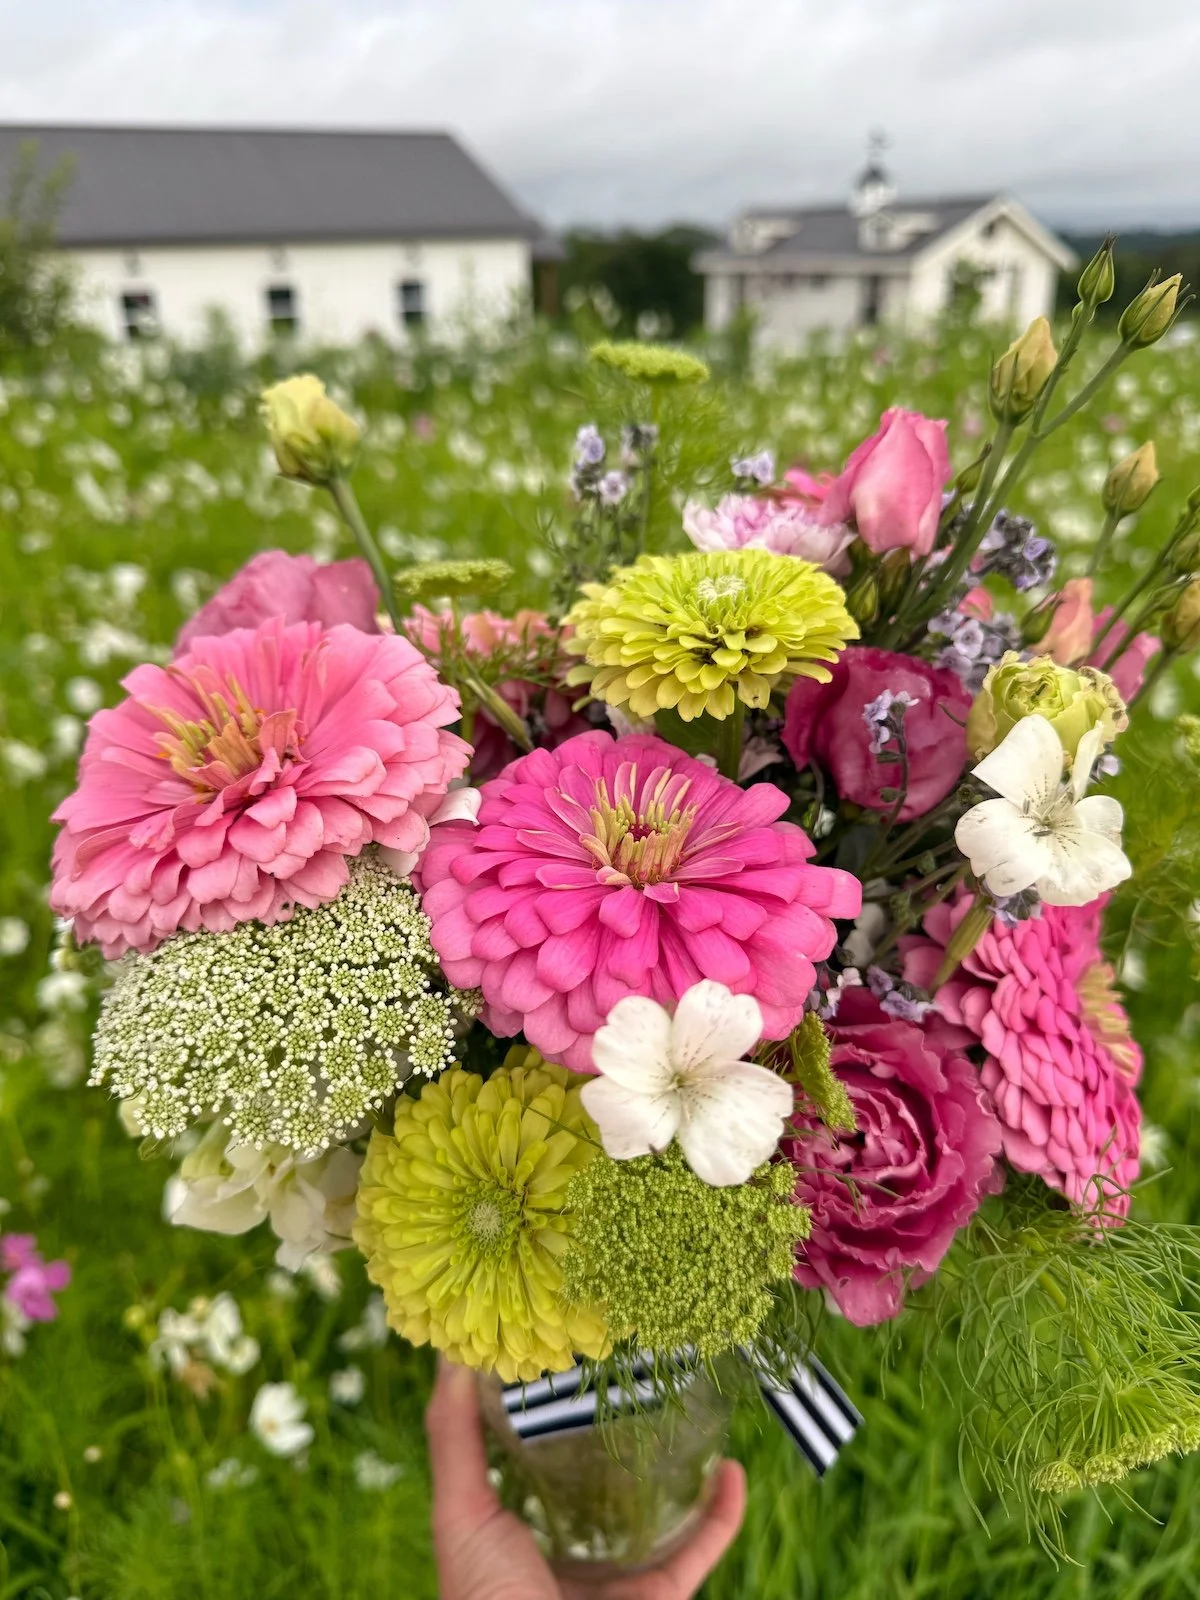
So what’s a Bouquet Membership like? It’s something to look forward to each month from May through September! We offer members the ability to either sign up to come out to the farm to pick-up a pre-made bouquet (by us), or to come out and cut their own bouquet each month.
From the moment you arrive at PepperHarrow to pick up your bouquet each month, time will seem to slow down. You’ll almost feel the sense of calm and relaxation come over you. You have a chance to actually pause, take a deep breath and not rush around, as you enjoy rows of flowers swaying in the breeze and watch bees move from flower to flower.
New this year, our bouquet membership includes even more time on the farm. From May through September, members are invited to visit PepperHarrow every Saturday during the season.
Bouquet pick-up will still take place on the second Saturday of each month, but now the Saturdays before and after are also open exclusively to members. During these open farm hours, from 10:00 AM–2:00 PM, members are welcome to escape to the farm, bringing family or friends along, or simply enjoying a quiet visit on their own.
Flowers have a special way of helping us feel better. They help us pause, look closely, and enjoy the moment. Beauty isn’t just something you see, it’s something you feel. As a member, you become part of this rhythm. Whether you visit the farm or follow along from home, you stay connected to a place where slowing down is welcome.
Thoughtfully Grown, Deeply Cared For
PepperHarrow is a working flower farm guided by respect for the land and long-term stewardship. Every membership directly supports sustainable growing practices, healthy soil, and ongoing projects like seed saving and flower breeding for new celosia and zinnia varieties we create.
We grow with intention and share openly. Members see the real rhythms of farm life. The planning, the patience, the challenges, and most importantly, the quiet moments of beauty that make it all worth it. Your support helps ensure this place continues to grow with care for years to come.
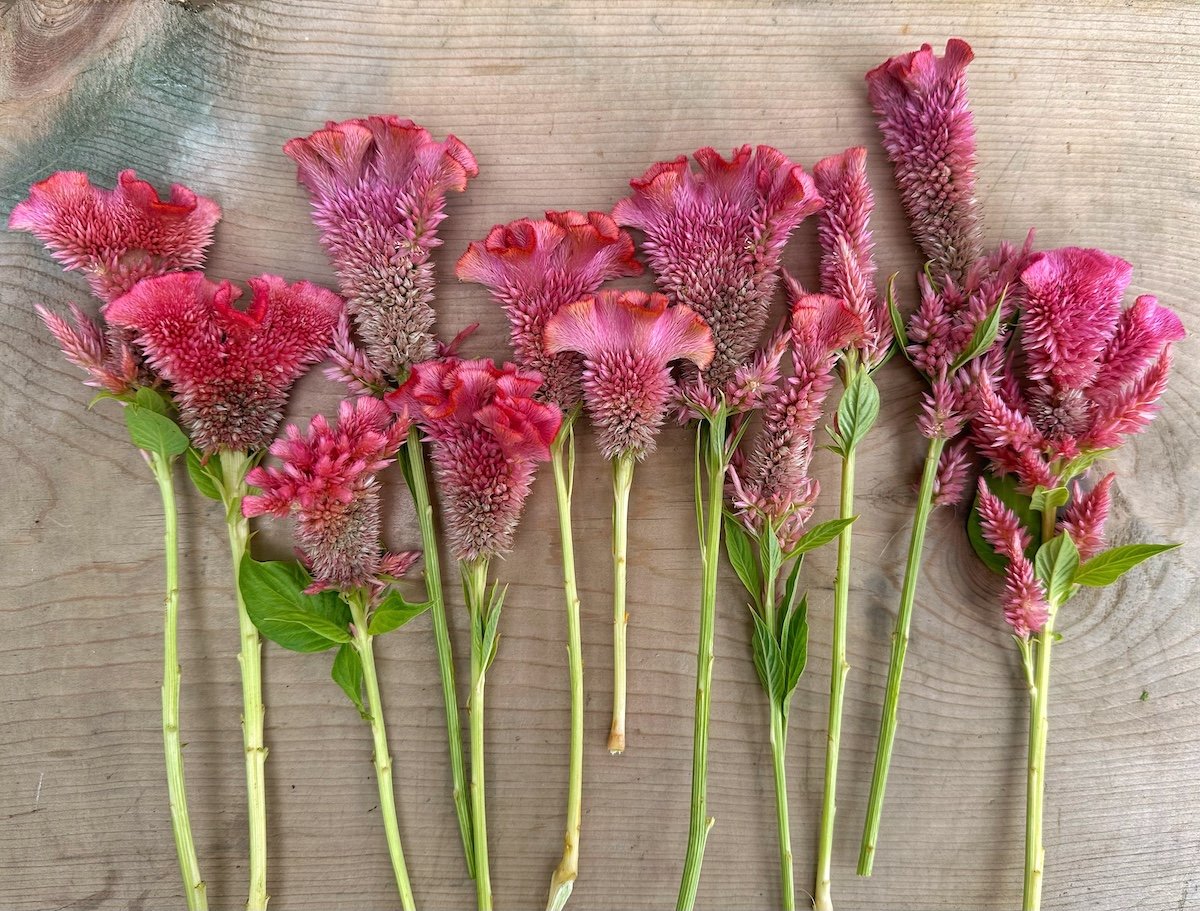
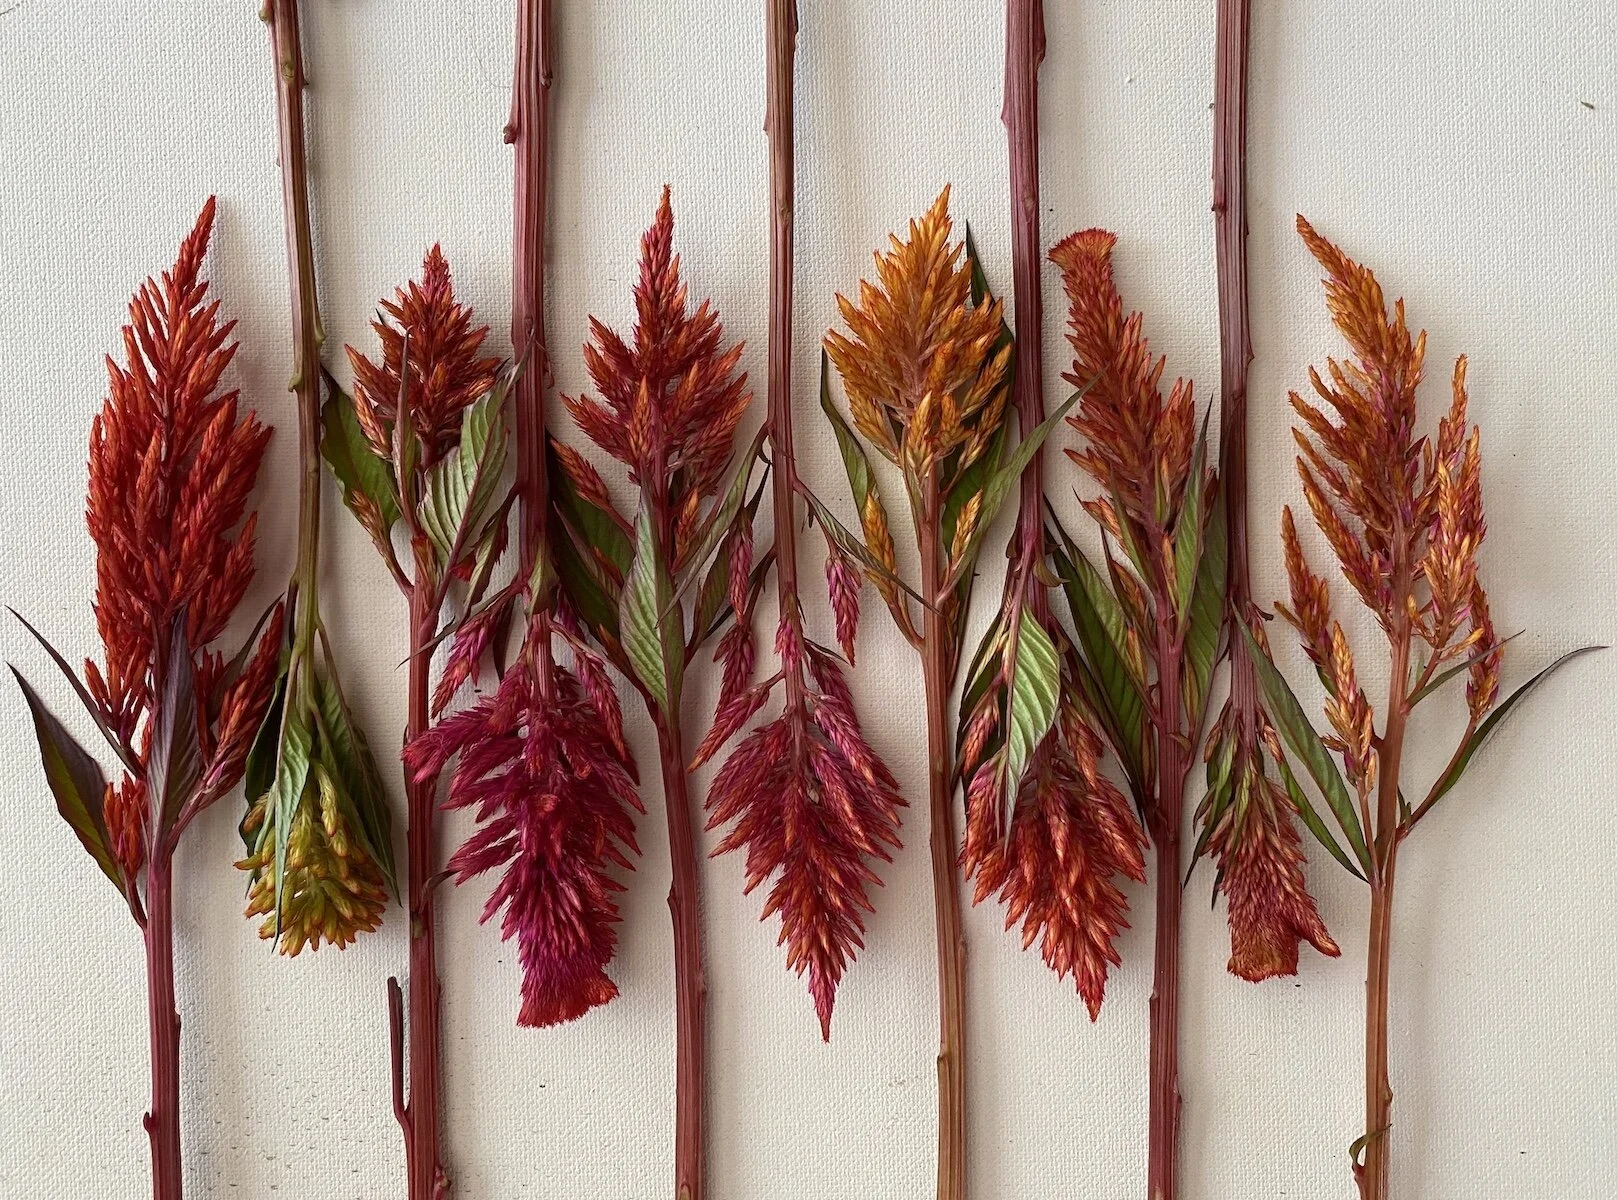
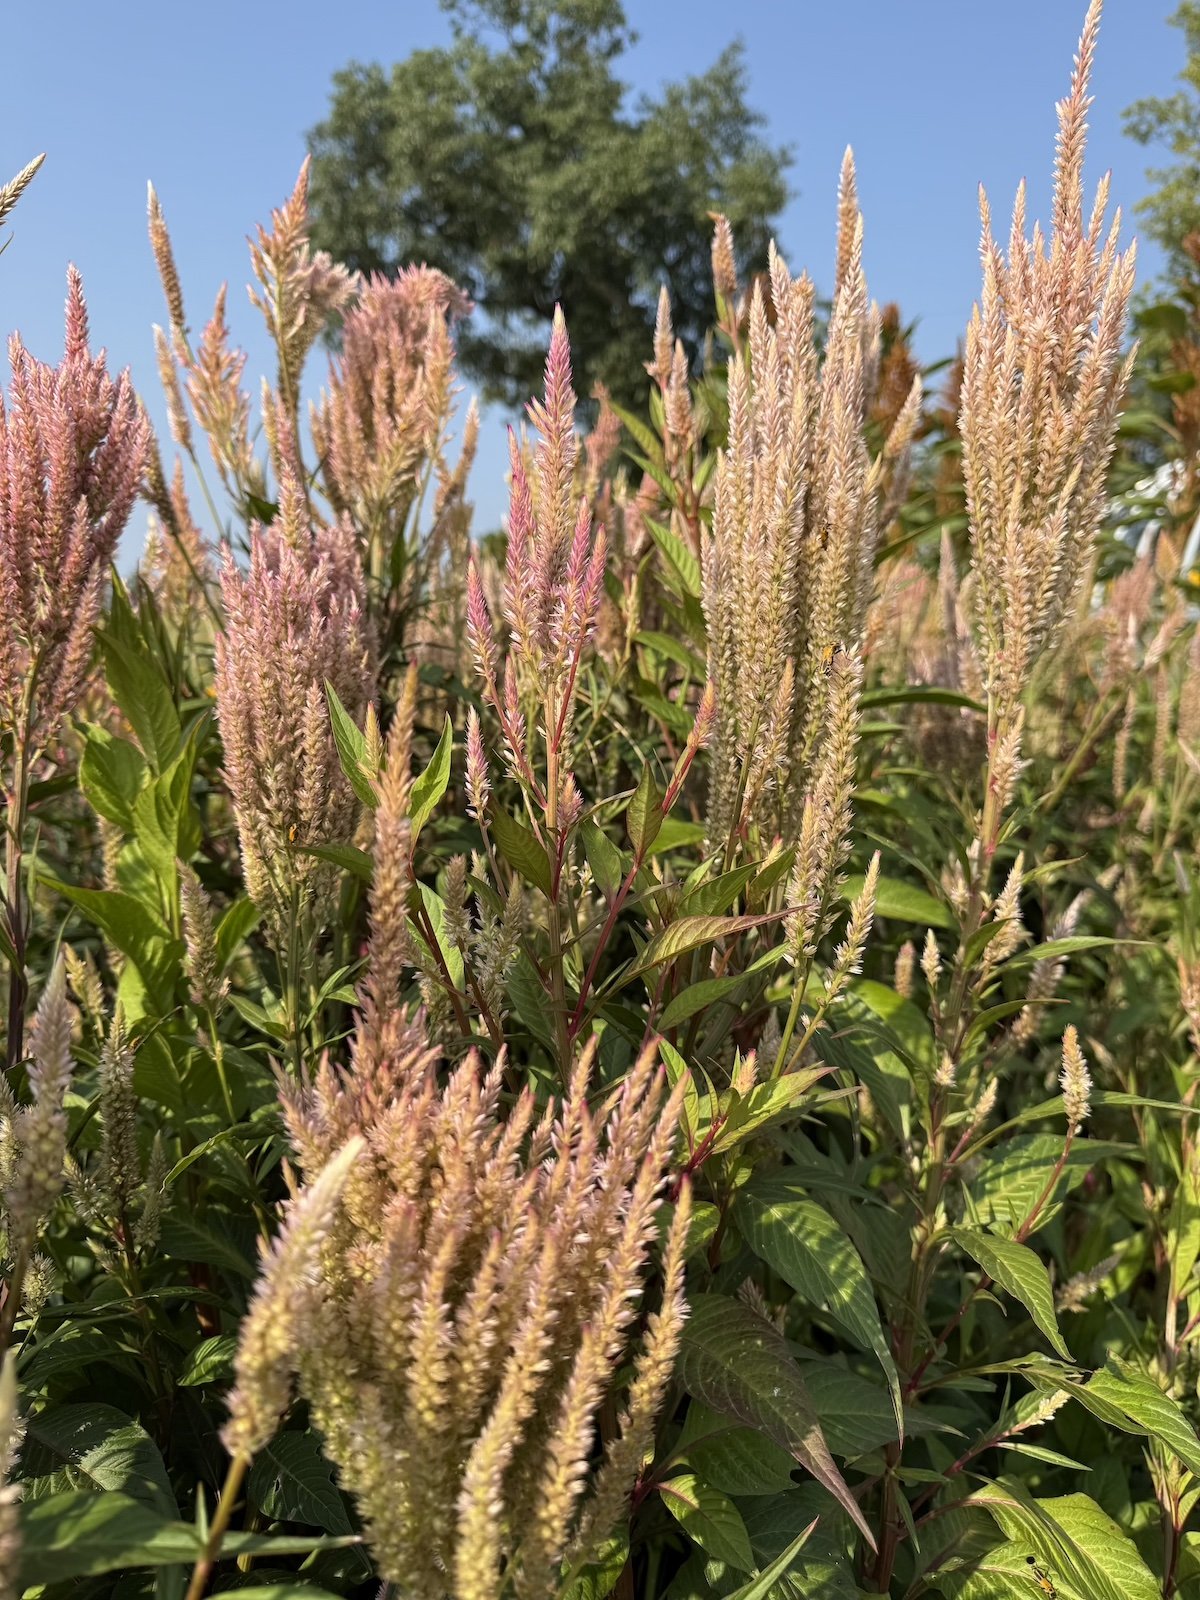
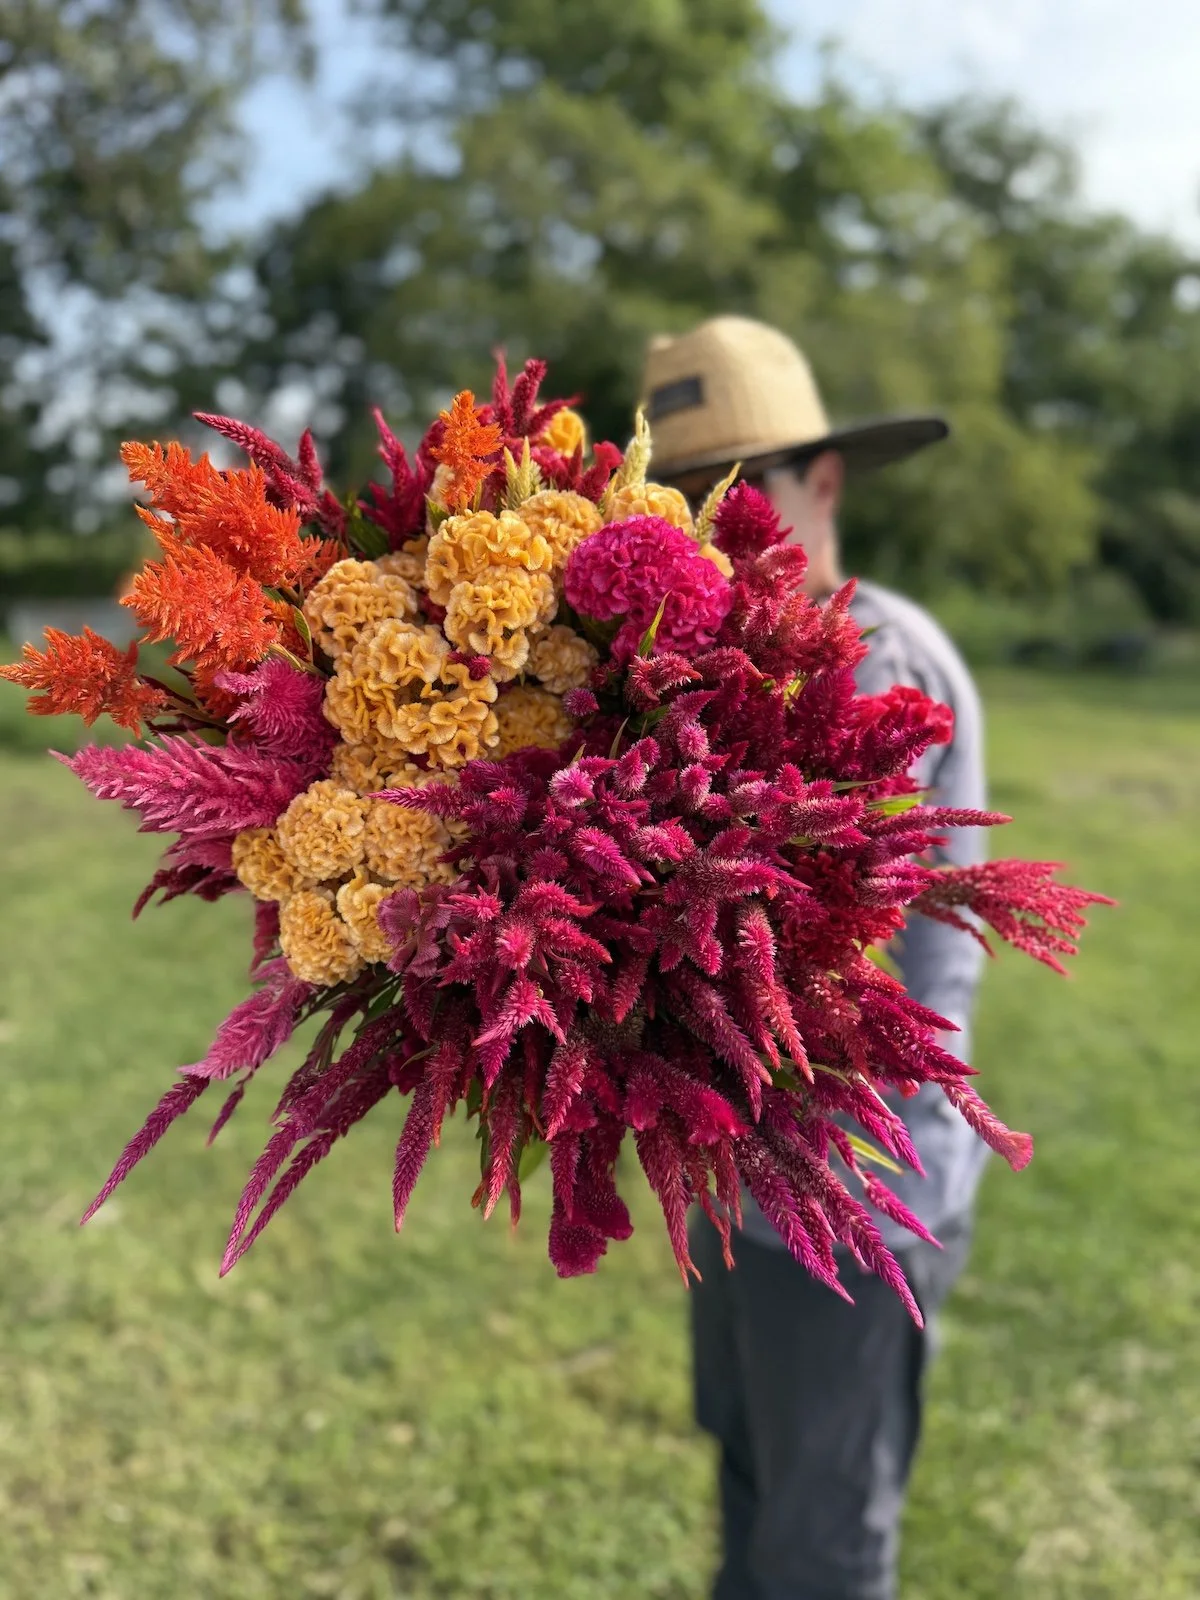
New Celosia Introductions!
The new varieties of celosia we’ve created have been popular additions for home gardeners and for other flower farmers.
Shown is a new variety that we’re working on that’s slated to be released in 2027. Isn’t the color incredible?!
NEW! Bloom Membership
Bloom members receive seasonal updates and behind-the-scenes glimpses into farm life, along with early access to workshops, festivals, and ticketed events. Members also enjoy priority access to limited releases such as seeds, bulbs, and farm-made goods. From time to time, a small surprise from the farm may arrive, a reminder that beauty often appears when we slow down enough to notice it.
Bloom is designed for those who want an ongoing connection to a place that values calm, creativity, and the natural world.
Other Ways to Become Part of the Magic
In addition to Monthly Bouquet and Bloom Memberships, we offer a limited number of seasonal memberships. These are created for those who want to bring home a little piece of the magic from PepperHarrow to the ease of their own space.
Early in the season, memberships offered are mostly plant based, including the popular Spring Plant-Cutting Garden, Culinary Herb, or Cut Flower Collections: Lisianthus or Lavender.

Join Us
Our memberships are intentionally limited so they can remain personal, thoughtful, and rooted in real connection. This is not about checking something off a list or rushing in and out. It’s about having a place to return to—a place where the seasons guide the pace, where beauty is part of everyday life, and where time feels a little softer.
If you’ve been longing for space to slow down, breathe deeply, and feel grounded again, we’d love to welcome you. Whether you come for the flowers, the quiet, or the simple joy of being on the land, there is a place for you here at PepperHarrow.
XX Jenn + Adam
Holiday Style Guide 2025
Handmade Beauty, Oversized Accents, and Rich Jewel-Tone Warmth
As winter starts to set in and the holiday season draws closer, we find ourselves returning to the comforting traditions that make this season feel so special. The holidays have always been about warmth, and the simple beauty of nature. This year’s Holiday Style Guide celebrates the spirit of that, with a focus on handmade décor, gorgeous accents, and a rich, jewel-toned palette that fills every space.

The Flower Cottage at PepperHarrow Decorated for the Holiday Season
Handmade Holiday Magic
The heart of the 2025 holiday season is a return to handmade, meaningful details. Decorations that feel touched by human hands bring a softness and authenticity that mass-produced pieces can’t replicate. This trend honors craft, patience, and the quiet joy of creating something beautiful.
Here are a Few Easy to Make Ideas!
Paper ornaments and simple handcrafted details
We love making cinnamon ornaments to our tree for a wonderful fragrance and they’re pretty easy to make! Another easy, but elegant touch is to cut your own paper snowflakes, a tradition that was passed down from my Great Grandma Vera.
Greenery foraged from the yard or farm for a grounded, natural touch
Grab a few small side branches off of a pine tree, or similar. Adding just a few pieces of greenery to your mantle, dining table, or other areas around your home, not only looks beautiful and inviting, but it also smells wonderful!
The goal for handmade items is to surround yourself with décor that feels personal, thoughtful, grounded, and connected to the season.
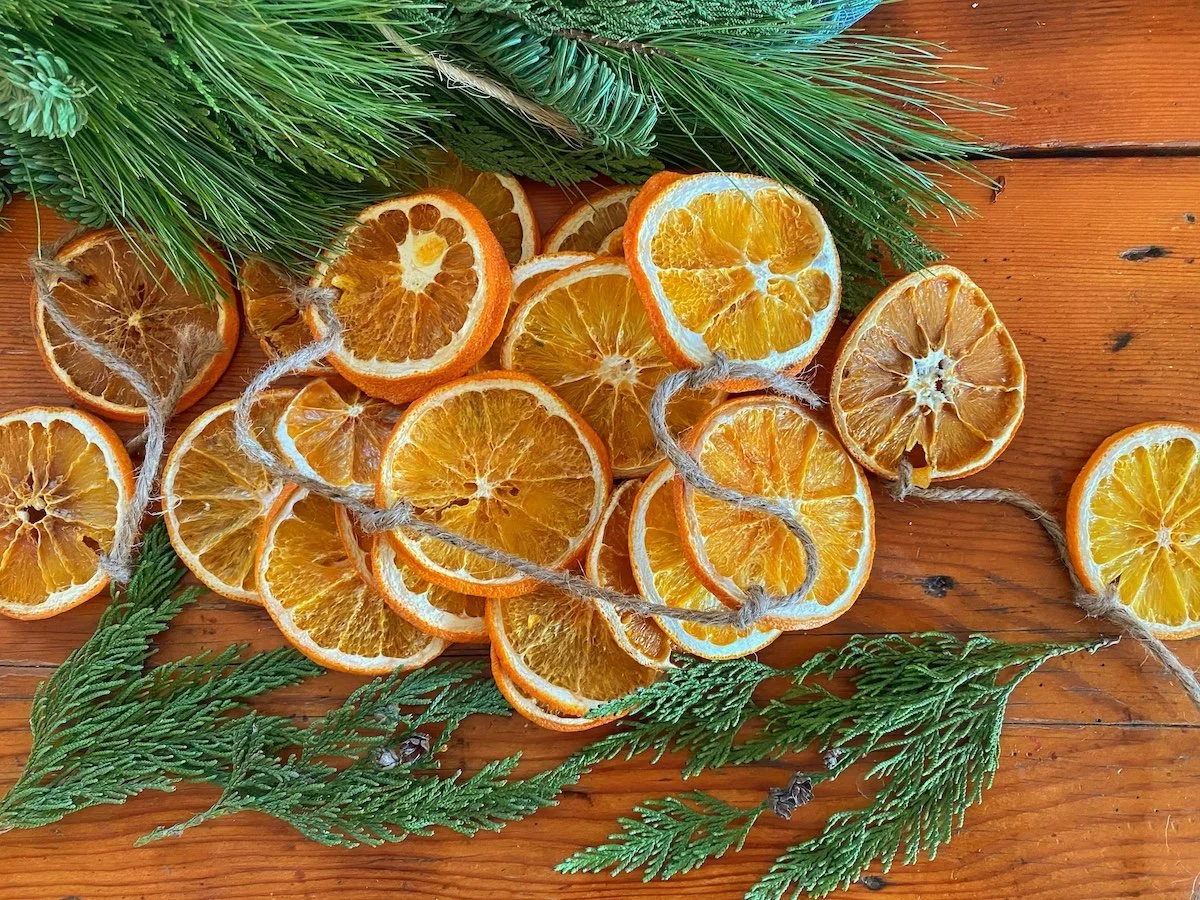
Dried Citrus for Decorations
Dried citrus garlands with all oranges orange mix of, ruby grapefruit, limes, and lemon for a refreshing take on dried citrus decorations for the holiday.

Handmade Candles
Hand-poured candles cast a warm, gentle glow. They’re perfect to make handmade gifts for your home, or to be made as thoughtful, easy to make handmade gifts for others.
Oversized Bells for Bold Warmth
Oversized bells are one of the standout accents for 2025. Their weight, texture, and scale add warmth and interest to even the simplest displays. With an antiqued finish, they carry the charm of old-world décor and elegance.
Ideas on How to Style Them:
+Add one or two large bells to a wreath for a strong focal point
+Hang a cluster from a newel post or staircase for a festive welcome
+Pair bells with draping ribbon for a classic holiday arrangement
These festive accents anchor a room and balance the lighter, handmade elements of the season.

Oversized Bells Hang on the Flower Cottage at PepperHarrow
Generous Bows
Oversized bows take a starring role in 2025. Large, voluminous bows bring softness, elegance, and just the right amount of drama. Velvet, silk, and soft cotton ribbons in rich jewel tones elevate any arrangement.
A Few Ideas for How to Use Them to Decorate:
Add a large bow with long tails as a tree topper for a gorgeous focal piece.
Finish wrapped gifts with an oversized bow for a luxurious touch
Pair ribbons with bells or greenery for layered styling
This is the year to let your bows take up space, adding movement and beauty wherever it’s used.
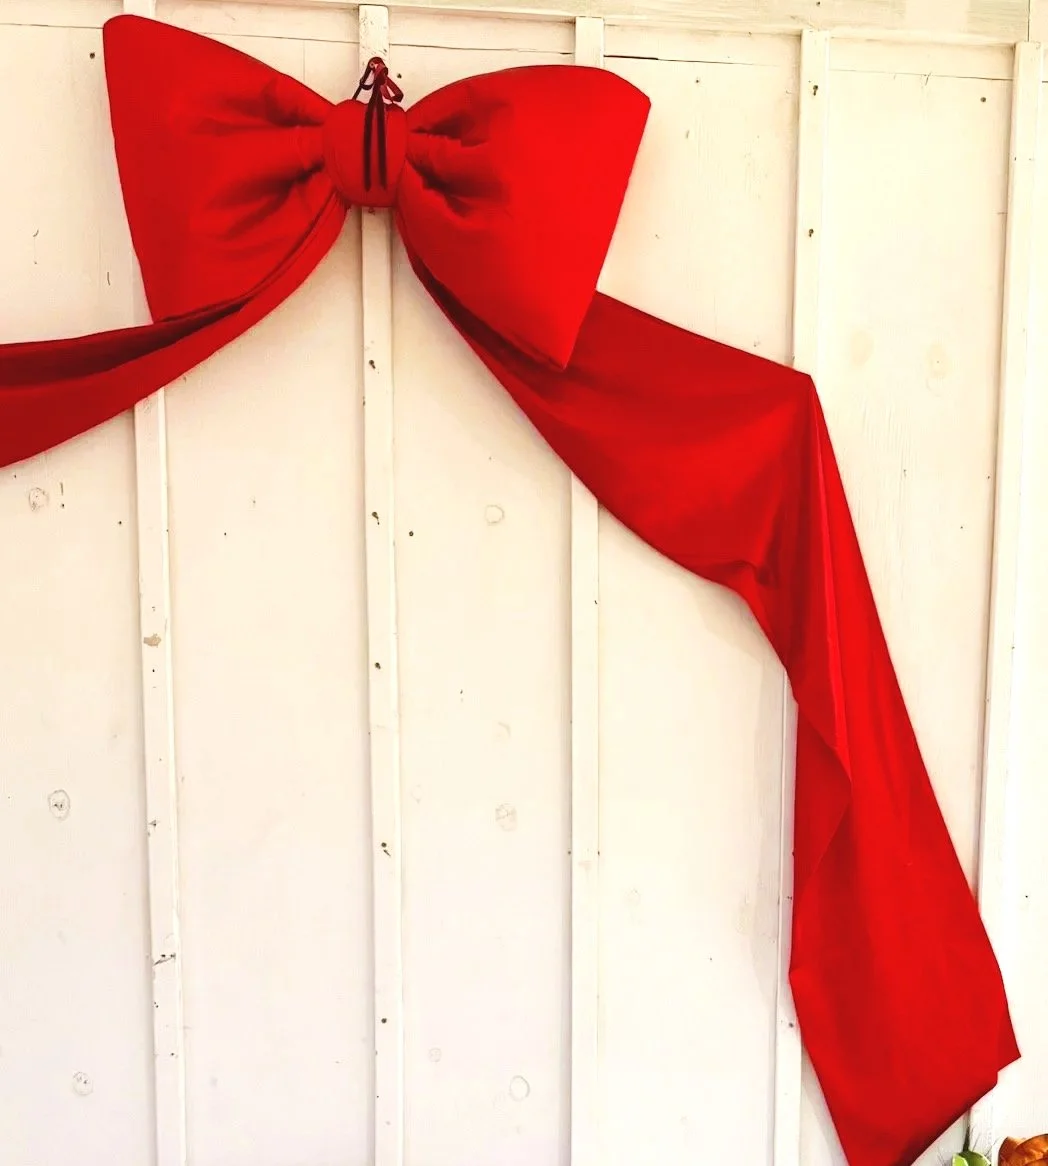
Oversized Bows
This year, we added an oversized bow for decoration in our event barn for guests to grab a photo or two during wreath making workshops.
Embracing Simplicity
While we do love big bows, it’s worth meting. that for wreaths this year, many are opting for minimalist bows, so they can add elegance, but not detract from the wreath itself. They’re going with bows tied with a knot added somewhere (top, bottom, sometimes the side) to the wreath with simple tails hanging down, or a sash, as shown (right).
The 2025 Color Story
This year’s palette is rooted in heirloom tones and the quiet glow of winter evenings. They’re colors that feel storied, collected, like something out of a Victorian Christmas. These hues are inspired by vintage holiday postcards, and worn velvet ribbons tucked in old keepsake boxes.
Deep jewel tones mingle with warm neutrals and antiqued gold accents, creating a look that feels both luxurious and lived-in. It’s an elevated palette that still invites you to settle in, relax, and enjoy the season.
Red to Dark Red
A rich, moody red that instantly brings a sense of tradition and warmth. This shade adds depth to mantles, garlands, and tablescapes, grounding your holiday décor with festive elegance.
Burgundy
Velvety and timeless, burgundy is the anchor of this year’s color story. It pairs beautifully with both greenery and gold, adding a romantic, old-world feel to ribbons, florals, stockings, and ornament collections.
Essex Green
A classic, sophisticated green that evokes evergreen forests and hand-cut wreaths. Essex Green is the quiet hero of the palette—deep and grounding, yet refined. It complements both rustic textures and refined holiday elements, making it an easy, versatile choice throughout the season.
Accents of Antiqued Gold, Brass, or Bronze
Any of these rich jewel tones with added antiqued metal elements create a palette that feels luxurious without being showy, perfect for both modern and traditional holiday decorating. They’re perfect with the jewel tone colors as a perfect rustic, but elevated accent.
A Season to Enjoy
The PepperHarrow look for Holiday 2025 blends handmade charm, expressive accents, and rich jewel tones into a style that feels both curated and deeply comforting. It is holiday decor that looks collected over time rather than purchased all at once. Every piece feels intentional. Every element carries warmth. To bring this style to life in your own spaces, let your décor evolve through natural textures, generous layering, and thoughtful details.

Adding Organic Elements
A grapevine wreath base with light greenery (Noble Fir), pine cones and a few small sparkles, really makes a home cozy and inviting..
Holiday decorating isn’t about chasing perfection or adhering to rigid trends. It is about creating an environment where people feel welcome and connected. A space filled with handmade details, thoughtful touches, and rich textures has a way of gathering everyone a little closer.
Whether you're crafting décor with your own hands, refreshing your home with new seasonal elements, or honoring beloved traditions passed down through the years, may this guide inspire you to fill your spaces with meaning, warmth, and beauty.
XX Jenn + Adam
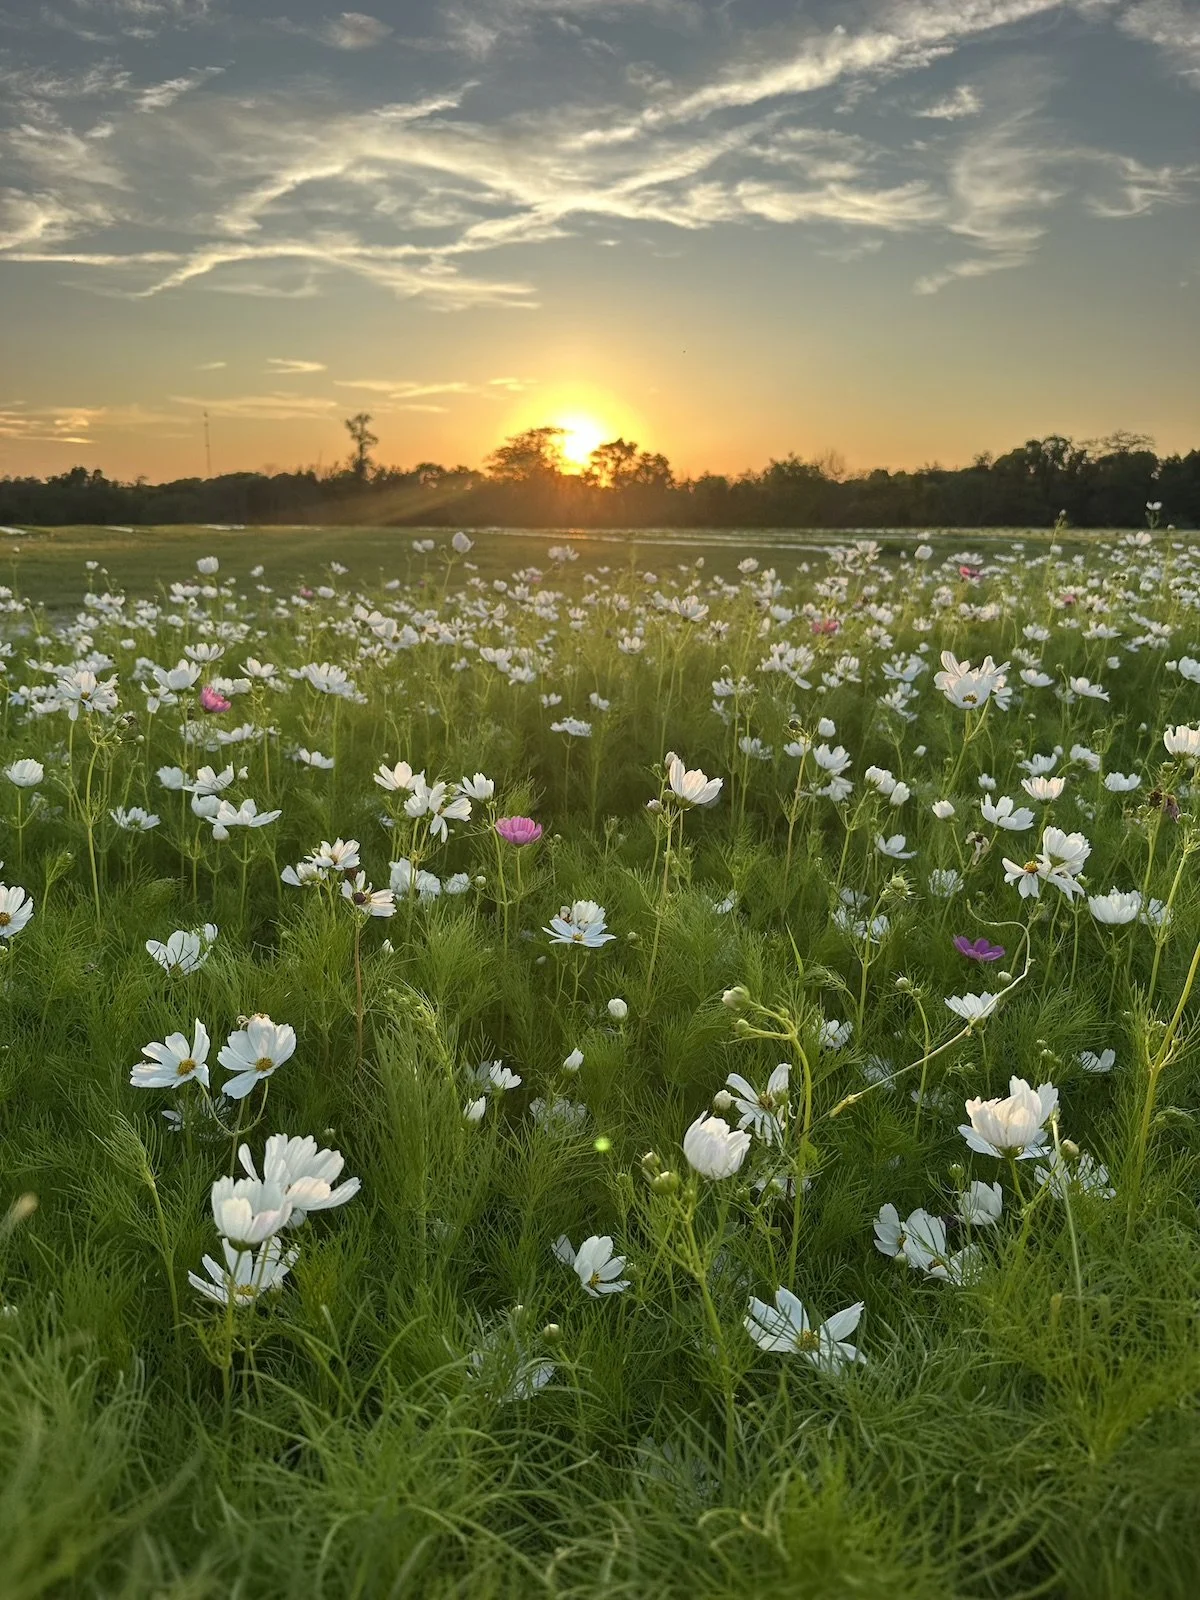
Common Issues with Cosmos and How to Fix Them
We’ve always had a soft spot for cosmos. How can you not love them? Their airy, fern-like foliage and cheerful, daisy-style blooms always seem to dance in the breeze. They’re the kind of flowers that seem to bloom with ease, happy to grow bloom for new gardeners and veteran growers like us, looking for a low maintenance bloom.
But even these carefree charmers can have their off days. Maybe they’re not blooming as they should, looking a little wilted, or showing signs of pest mischief. Don’t worry, there’s usually a simple reason behind it and an easy fix to get them thriving again. Here’s a look at some of the most common cosmos troubles we see here at the farm and how to help your plants bounce back.
Heat Stress
Cosmos are known for being heat-tolerant, but extreme heat, especially prolonged periods above 90°F (32°C), can lead to stress. This can result in fewer blooms, smaller flowers, wilting, and even scorched leaves. Our cosmos really struggle growing during the heat intense summers of Central Iowa, zone 5b. Here’s the tips we have for handling the heat!
How to Fix It:
Water deeply, but infrequently. Let the soil dry slightly between waterings to avoid root rot.
Add a 2–3-inch layer of organic mulch to insulate roots and holds moisture.
Use a shade cloth or plant cosmos where they get morning sun and afternoon protection.
Avoid transplanting during heatwaves and wait for milder weather.
Tarnished Plant Bug (TPB)
TPBs (Lygus lineolaris) are one of the most common insect pests of cosmos. They’re the worst! These fast-moving, camouflaged bugs puncture flower buds and suck out the juices, leaving behind distorted or dead buds. These tiny pests are a serious problem in many gardens, especially during warm, dry spells.
Symptoms include deformed flower buds that fail to open, buds that turn brown or appear scorched, black spots or sunken lesions on stems and flower parts, or a general decline in bloom production.
How to Fix It:
Scout early and often. Check your plants regularly for signs of TPB activity, especially during bud formation.
Encourage beneficial insects like ladybugs, damsel bugs, and parasitic wasps that help keep TPB populations in check.
Remove affected buds as soon as possible. If you spot damaged buds or flowers, prune them off and discard them. This prevents the bugs from spreading further.
If the infestation is mild to moderate, organic treatments like neem oil or insecticidal soap can help. Spray in the early morning or evening to avoid harming pollinators.
For severe infestations, lightweight row covers can protect young plants, though they should be removed during flowering to allow for pollination.
Other Pests
There are a couple of pests to be aware of that especially like cosmos. Aphids are the most common, especially in spring and early summer. They feed on plant sap and excrete sticky honeydew, which can attract sooty mold. Watch out for clusters of small green, black, or brown bugs on stems or buds, sticky residue on leaves, and yellowing or curling foliage.
How to Get Rid of Aphids:
Blast them off with water.
Spray with insecticidal soap or neem oil.
Attract natural aphid predators like ladybugs and lacewings.

Final Tips for Healthy Cosmos
Deadhead spent blooms regularly to prolong flowering.
Rotate plantings each year to reduce pest and disease buildup.
Grow cosmos in full sun (6+ hours daily) for best performance.
Don’t over-care as cosmos prefer neglect over fuss.
Try growing them for blooms in late spring-early summer or late summer-early fall.
Want suggestions on good varieties to check out? Watch our YouTube video here.
If your cosmos are struggling, start by checking the two biggest suspects, too much heat and tarnished plant bugs. With a few simple strategies, like adjusting sun exposure, managing pests organically, and avoiding overwatering or fertilizing, you can get your cosmos back to full bloom and keep them thriving all season long. Happy growing y’all!
XX Jenn and Adam